Why Attic Vents are Important and How to Properly Install Them
Many customers ask about ways to get more for their air conditioning dollar. Although most people think of things like caulking trim and adding more insulation, fewer realize that good attic ventilation is an equally important part of the equation. Attic vents are easy to install — the process only requires some simple tools and a few hours on the roof.
How Attic Ventilation Works to Keep Your Home Cool
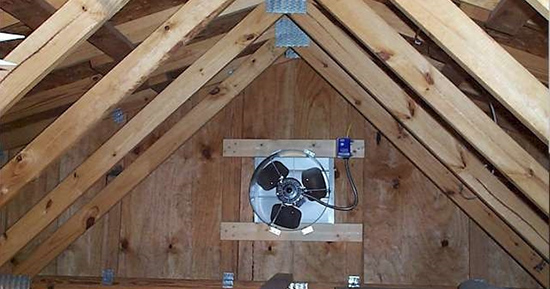
Like garages and enclosed porches, the heat that builds in your attic can transfer back into your living space if there’s too much — and attics are notoriously hot. In even the best insulated attics, heat can’t radiate back through ceilings efficiently, which is why well-placed vents are so important. It’s not enough to have an outlet on the roof; you also need to install soffit vents to pull cooler air in from outside.
Unlike a chimney, where heat goes straight up and out, vents need a source of fresh air to help pull hot air out of your attic. Some homes manage this with gable vents, others with soffit vents. Whatever your source of outdoor air may be, it’s important to have just a little bit more coming in than going out to help force the hotter air up and out of your new roof vents.
By venting your roof, you also decrease the moisture in your attic, thereby preventing mold and rot, and minimize the risk of ice dams if it snows in your location. In addition to saving on cooling and heating costs, there are plenty of good reasons to install proper attic ventilation in your home. For the very best results, however, you need to keep your attic free of anything unnecessary, including storage items that might impede air flow.
Putting in the Vents
You’ll need the roof vents of your choice, some 1 ¼-inch roofing nails, a carpenter’s pencil, chalk, a utility knife, a pry bar, a caulk gun, a tube of roofing cement (one should be good for three vents), a cordless drill with a ½-inch or larger wood-boring bit, and a jigsaw or reciprocating saw to install the attic vents on your roof. Start by going into your attic and marking the location of your new vents with a pencil, spacing them evenly across the roof, about 18 inches from the peak, and between rafters.
Once marked, drive nails in the four corners of the locations of the holes for the roof vents, inside the section of wood you’ll remove. Make sure the nails penetrate all the layers of your roof so you can find them when you climb up to remove the shingles and decking.
On the roof, you’ll have the find the nails and mark them with chalk before you can start installing your vents. Draw a square around the nails with chalk, ½-inch outside of the nails, to simplify the job. Use a utility knife to remove the shingles and drill a starter hole in one corner of the decking. Cut out the vent opening with your saw and discard the wood.
Loosen the shingles immediately surrounding the opening with a pry bar and remove any nails that might prevent the vent from sliding into place. Position the vent so the shingles overlap the top half of the vent and the vent overlaps the shingles below. If you’re confident in your vent’s position, you can remove it and apply some glue to the underside of the bottom half to help adhere it to the shingles.
Slide the roof vent back into place, carefully pressing on the glued area to push out any air bubbles. Lift up the shingles that overlap the roof vent and squirt some glue evenly between the shingles and the vent. Nail through the holes on the lower half of the vent to prevent it from moving. You can also spray paint your roof vent if needed to make it match your roof if it’s too obvious, Spray paint won’t affect functioning.


